UPDATE PHP click here download free PDF of instructions.
Updating PHP in some web hosting accounts can be a challenge. That need not be. There is no need for web hosting providers to make updating PHP difficult. DIYers, people choosing to build their out website on a do-it-yourself basis, should not be hampered by website hosting providers who make it difficult for domain owners to update PHP.
In this article, we will review and demonstrate how easy it is for members to update PHP configuration with ease at Website Web Hosting Services.
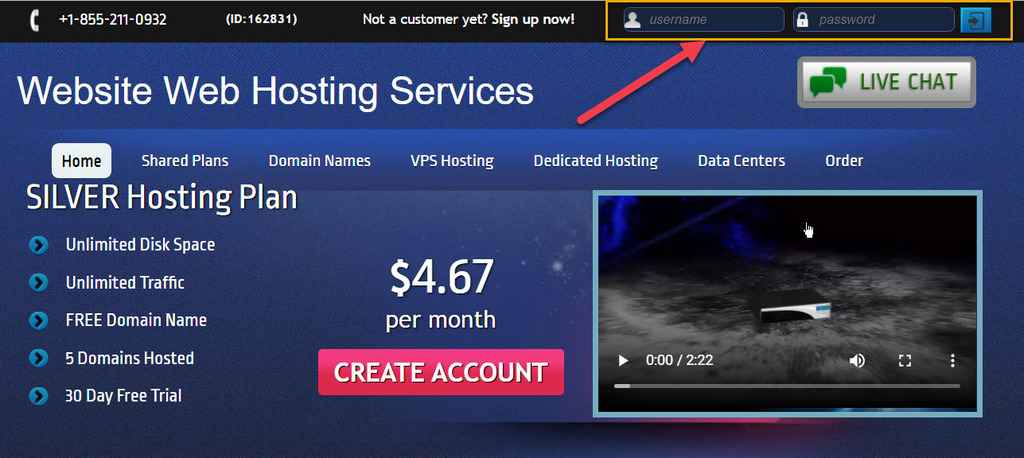
Website Web Hosting Services (https://wwhs.ca) are champion service providers for DIY website entrepreneurs, small businesses, professionals, and others who want to build and manage their own website on a do-it-yourself basis.
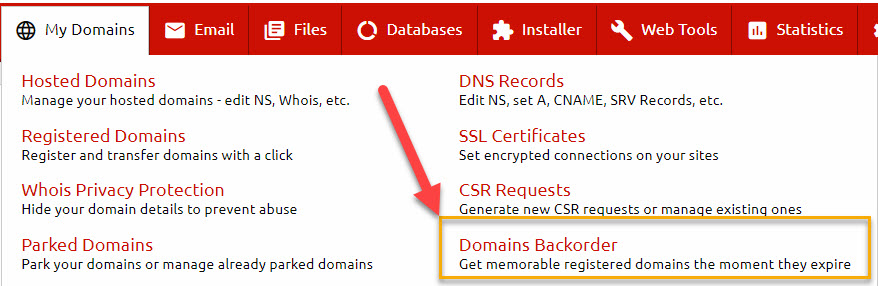
By-the-way, Website Web Hosting Services offers a wicked domain name backorder service. All you need to do to access it is be a member.
Membership is open to anyone who registers with or transfers a domain name they already own to Website Web Hosting Services.
For a free copy of the presentation in PDF format, click here.
To watch a video tutorial on how to update PHP settings for you domains hosted with Website Web Hosting Services, click the image.
FAQs ….
PHP stands for Hypertext Preprocessor. It is an open-source server-side programming language that is used for running web scripts and for processing data passed via the CGI (Common Gateway Interface) from HTML forms etc.
PHP can be written as scripts that reside on the server and may produce HTML output that downloads to the web browser.
Alternatively PHP can be embedded within HTML pages, which are saved with a .php file extension. The PHP sections of the page are then parsed by the PHP engine on the server and the PHP code stripped out before the page is downloaded to the web browser.
The PHP Configuration is your Website Web Hosting Services hosting account PHP environment manager. From there you can control all of your PHP settings.
There are 3 separated tabs available in the update PHP configuration section. They are …
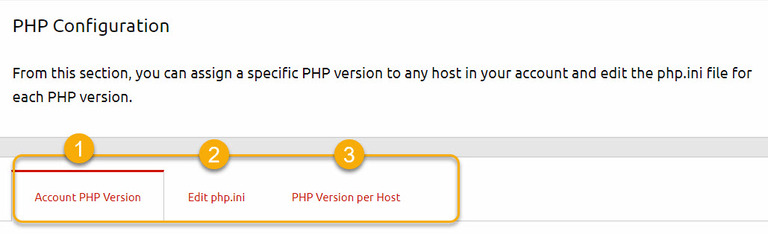
Account PHP Version – From there you can select a default PHP version for all hosts in your account.
A list of the common php.ini settings is presented in a dropdown.
Edit php.ini – Through the edit php.ini list a user can easily manage the PHP settings and configuration of their hosting account.
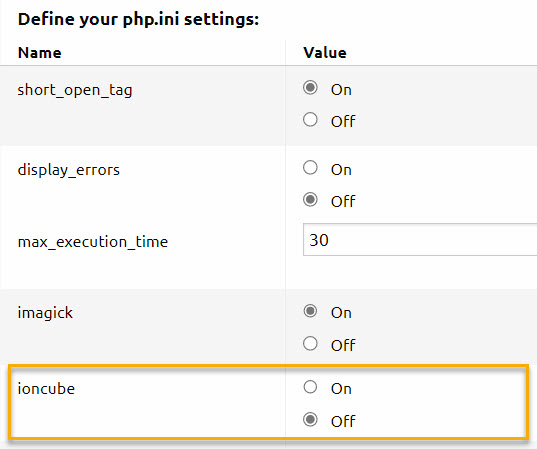
Using the Define your php.ini settings table, users can modify their php.ini settings with just a few clicks.
To get access to the entire php.ini file content, switch to “Advanced Mode“.
Note …
… any changes will require approximately 10 minutes for the system to update.
… by default when editing you are editing the PHP settings for the active hosting account PHP version. If you need to edit the php settings for another PHP version, select it by choosing the PHP Version menu.
PHP version per host – To update PHP for a specific host, use the PHP version per host feature. Just select the host from the list and choose its PHP version, then Save Changes.
There are two different ways to edit the php.ini for your account.
By default, the editing options are set in Basic mode where you can easily switch on and off all important PHP settings.
To save your changes click the “Save Changes” button. If an error occurs, you can always restore the default php.ini settings using the “Restore Defaults” button. If you want to go back to your previous php.ini version – use the “Reset Form” button.
The Advanced mode allows you to adjust all php.ini setting by simply editing the file in build file editor. Once again, you can restore your php.ini setting to its previous values or reset them to the server’s defaults.
Basically there are four types of errors in PHP. They are …
– Parse Error (Syntax Error)
– Fatal Error.
– Warning Error.
– Notice Error.
To display all of the errors including syntax or parse errors the PHP has use the display_errors directive.
Sometimes you may get a Blank page, Internal error, or software, like WordPress, showing “There Has Been a Critical Error on Your Website”.
To find the actual reason for the problem you will have to enable the PHP errors display.
To enable the display_errors: Go to PHP Configuration -> tab Edit php.ini -> locate display_errors and select ON, then Save the changes and you are all set.
Our advanced PHP Configuration manager allows you to choose a different PHP version for each of your domains or subdomains, in case one or more of your sites requires a specific PHP version.
To configure that, please click on the PHP Version per Host tab, select the host you need to set a PHP version for, choose the PHP version and Save Changes.
Note: If you need to adjust certain settings for the selected PHP version, please click on the Edit php.ini tab, select the version you need to edit and make the required changes.
Sometimes a user may need to upload large files from their PHP based websites. In case that file is larger than the upload limit, there will be an error message.
To solve this, a user can increase their account or selected PHP version upload limit. If doing that, there are two settings to consider …
Note: Make sure that you have selected the exact PHP version, the site you want to make the changes for is using.
This sets the maximum amount of memory in bytes that a script is allowed to allocate. This helps prevent poorly written scripts for eating up all available memory on a server.
For example the default memory limit for WordPress is 32 MB. It is very common to exceed this limit and get the error Fatal error: Allowed memory size.
To increase the memory limit go to PHP Configuration -> tab Edit php.ini -> set the value, for example 256M and Save changes.
Note: Make sure that you have selected the exact PHP version, the site you want to make the changes for is using.
ionCube was created in 2002. It gave developers tools to protect software written in the PHP programming language from being viewed, edited, and ran on unlicensed computers. The tools use a technique of compiling the bytecode prior to encoding so that the source code is eliminated, and runtime overheads are reduced.
By default the ionCube is not active. You may have a software that requires it to get started. If that is the case, you need to activate the ionCube loader.
Confirm the version of PHP your site uses. Even after you have set the PHP version in your panel, you should still check to confirm that version is the one running on your site.
To enable ionCube: Go to PHP Configuration -> tab Edit php.ini -> locate ioncube and select ON, then Save the changes and you are all set.
Update PHP configuration is an activity webmasters need to pay attention to. Even if you are a DIY, do-it-yourself, website builder you too need to check your PHP configuration from time-to-time.
One of the most important reasons for this is security. PHP updates happen for several reasons. One is vulnerability, security. Another is speed. For these reasons it is important PHP configuration updates be routine.
At Website Web Hosting Services, the system will automatically update your hosting account’s PHP configuration automatically. However, the updates are on an as needed basis. So if the website is functioning properly, the system will not apply any unnecessary updates that might interfere with the proper functioning of the website. They system activates PHP configuration updates automatically on an as needed basis.
This means there could be a newer version available that would benefit your website. In theses instances, it is best if you manually update PHP.
The tutorial has demonstrated to update PHP on one or multiple domains you host is easy.
By-the-way, if you are not already a Website Web Hosting Services member, all that is required is for you to have one domain name registered with them. You can register a new domain name or transfer one that you already own.
A side benefit is that any domain you register and not add hosting to, you get three complimentary email addresses associated with the domain name that is parked.
Another perk is the awesome Domain Name Backorder feature. Many domainers, people who buy and sell domain names, become members just so they can take advantage of the Domain Backorder feature.